ஆகஸ்ட் 2014 | பல்சுவை தகவல்கள் - Thagavalgal in Tamil ஆகஸ்ட் 2014 ~ பல்சுவை தகவல்கள் - Thagavalgal in Tamil

பல்சுவை தகவல்கள் - Thagavalgal in Tamil- Interesting Information in Tamil Useful Information you should know - Computer Tips, Health Tips, online offers, and more helpful Tips and Tricks நீங்கள் தெரிந்து கொள்ள வேண்டிய பயனுள்ள தகவல்கள்

வெள்ளி, 29 ஆகஸ்ட், 2014

How to Restore Deleted Whatsapp Messages from your Smartphone

Hello guys, Today I will be discussing with you a very important trick by which you can easily Restore deleted whatsapp messages. We all know that whatsapp is the most popular instant messaging application available for our smartphones. Every other person in the world is using whatsapp for communicating with friends, relatives and  family.

As you all know that touchscreen devices are just awesome but sometimes they can be very annoying. With one wrong touch everything can get easily erased. Let me put a situation for you. By touching a wrong option you can easily delete your all important conversations available on whatsapp and then what will be your next step?

How to Restore Deleted Whatsapp Messages


Many among us know that how to Recover deleted whatsapp conversation on their smartphones. But for those who are not knowing about this trick, today this article is specially for those guys only. Below I have separated the Restoring process in 2 simple methods.
  1. With the Help of Manual Method

  2. Doing it by taking help of web applications
So, without taking much time let’s move over the first method that is of by recovering whatsapp deleted conversations by manual method.

1. Manual Method

There are very less amount of people who know’s that whatsapp creates daily backup of all the data at the system time i.e, at 4 a.m. These backup’s normally get stored in the SD card. So, if you are searching for how to get back deleted messages easily then carefully start following the below listed steps.

Step 1. Firstly, Open your SD card and then go to WhatsApp > Databases.

Step 2. After opening the Databases Folder you will see your conversation backup files which are like msgstore-2014-04-05.1.db.crypt. These files are not given these names simply but if you see carefully then you will notice that these files consist dates.

Step 3. In that folder you will see that there is one file named as msgstore.db.crypt, You have to simply rename that file by adding a word in front of it.

Step 4. After performing the above steps carefully, search for the file which shows you date before you have deleted your conversation.

How to Recover Deleted Whatsapp Messages 
 
Step 5. After finding that file, rename that file to msgstore.db.crypt.

Step 6. Now go to Settings > Applications > Manage applications > Whatsapp and then clear all the data. 

Open whatsapp again and then choose the restore option which will be automatically be shown to you as you open the application.

That’s it. You have now all your deleted messages which are not actually deleted from your phone. 

So guys, this one is the manual method now let’s move towards the next method. Keep reading this article and find out.
 
 2. By using Web Application
By seeing the name only you all guys came to know that we will be taking some online help for Restoring deleted chats. Exactly, In this method we are going to take help of a web application which is know as Recover messages. Recover messages is an online application which is specially designed for such incidents only. You can use this service absolutely free of cost.

But the next question rise is that how to operate this website ? Just start following the below steps and Resotre your conversation on your smartphone back.

Step 1. Go to http://recovermessages.com/ and then click on select SQlite file to upload your database file.
 Step 2. Select The Database file which you are willing to recover from your SD card.

Step 3. Then simply Accept the terms and conditions of use and then click Scan.

Now, wait to a minute and then you will be shown all your deleted whatsapp conversation again back on your smartphone. So, isn’t this method simple for use.

Hope, you have now get the exact and simple solution for your problem. If you have any type of doubts in your mind after going through the above article properly then you can leave your comments below in the comment box and at the last do not forgot to share this article with your friends… :) 
If You Like This Post Please Mind to Share It.

அனுப்பிய மெயில் படிக்கப்பட்டதா?

வணக்கம் நண்பர்களே..!
நீங்கள் அனுப்பிய மின்னஞ்சல் உரியவர் படித்துவிட்டாரா இல்லையா என்று எப்படி அறிந்துகொள்வது?
email tracker
அந்த வசதியை நமக்கு கொடுக்கிறது ஸ்பைபிக் என்ற தளம்.

நீங்கள் பயன்படுத்தும் E-Mail கிளையண்ட் எதுவாக இருந்தாலும் சரி.. அதாவது, Gmail, Yahoo mail, Rediffmail, Eudora, Gmail, Hotmail, AOL Email இப்படி எந்த ஒரு மின்னஞ்சல் சேவையை நீங்கள் பயன்படுத்தினாலும், இச்சேவையைப் பயன்படுத்தி, உங்கள் நண்பர் மின்னஞ்சலைத் திறந்து படித்துவிட்டாரா இல்லையா என்பதை அறிந்துகொள்ள முடியும்.
  1. மின்னஞ்சலை தட்டச்சிட்டு வைத்துக்கொள்ளுங்கள்.
  2. பிறகு www.spypig.com தளத்திற்குச் சென்று உங்கள் மின்னஞ்சல் முகவரி, மின்னஞ்சலின் தலைப்பு ஆகியவற்றை கொடுத்துவிடுங்கள். 
  3. அடுத்து Select your SpyPig tracking image என்பதற்கு கீழாக உள்ள ஐந்து படங்களில் ஏதேனும் ஒன்றினை தேர்ந்தெடுக்கவும். (அல்லது உங்கள் விருப்ப படங்களையும் உங்கள் கணினியிலிருந்து தேர்ந்தெடுத்துக்கொள்ளலாம்.)
  4. பிறகு click to create my spypic என்ற படத்தின் கிளிக் செய்யவும். 
  5. இப்பொழுது உங்களுடைய tracking image உருவாகியிருக்கும். 
  6. அதை காப்பி செய்துகொண்டு, நீங்கள் தட்டச்சிட்டு வைத்திருக்கும் மின்னஞ்சலில் இறுதியில் Past செய்துவிடவும். 
  7. இப்பொழுது உங்கள் மின்னஞ்சலில் Send பட்டனை அழுத்தி மின்னஞ்சலை அனுப்பிவிடவும். 
உங்கள் மின்னஞ்சல் நண்பரை சென்றடைந்து, அதை அவர் திறந்ததும் உங்களுக்கு மின்னஞ்சல் திறக்கப்பட்டுவிட்டது என்ற தகவல்களும், எந்த ஊரிலிருந்து திறக்கப்பட்டது என்ற தகவல்கள் அனைத்தும் வந்துவிடும்.
அவசரத் தகவல், மிக முக்கியமான தகவல்கள் உள்ளடக்கிய மின்னஞ்சல் உரியவர் படித்துவிட்டாரா இல்லையா என்பதை உடனடியாக அறிந்துகொள்ள இந்த சேவை பயன்படும் என்பதில் சந்தேகமில்லை.

Employment – ஆன்லைனில் பதிவு செய்வது எப்படி? தெரிந்து கொள்வோம்


 தமிழகத்தில் இதுவரை வேலைவாய்ப்பு அலுவலகங்களுக்கு நேரில் சென்றுதான் கல்வித் தகுதியைப் பதிவு செய்ய முடியும் என்ற நிலை இருந்து வந்த நிலையில், தற்போது
அனைத்துப் பணிகளையும் வீட்டிலிருந்தபடியே ஆன்லைனில் செய்து கொள்ள முடியும். ஏற்கெனவே வேலை வாய்ப்பு அலுவலகங்களில் பதிவு செய்தவர்கள், இந்த இணைய
தளத்தில் தங்களது பதிவு எண்ணை உள்ளிட்டு தங்களது கல்வி விவரங்களை சரிபார்த்துக் கொள்ள முடியும்.
இன்று நாம் புதியதாக ஆன்லைனில் பதிவு செய்வது எப்படி என்று பார்ப்போம். இதற்கு குடும்ப அட்டை, சாதி சான்றிதழ், 10th (or) 12th மதிப்பெண் அட்டை கண்டிப்பாக
கையில் வைத்திருத்தல் வேண்டும்.

முதலில் இணையதள முகவரி [to_like] www.tnvelaivaaippu.gov.in [/to_like]என்ற இணையதளத்திற்கு சென்று
click here for new user ID registration என்று இருக்கும் அதை கிளிக் செய்தால் ஒரு விண்டோ ஓபன் ஆகும் அதில் I agree என்று சொடுக்கி அடுத்து வரும்
பக்கத்தில்
பதிவு செய்யும் விண்ணப்பதாரரின் பெயர், ஈமெயில் முகவரி, user id என்ற இடத்தில் புதியதாக ஒரு ID கொடுக்கவும், பின்பு அப்பா பெயர், பிறந்த தேதி, குடும்ப அட்டை
எண்ணையும் Image Code என்ற இடத்தில் கீழே கொடுக்கப்பட்டிருக்கும் codeஐ கொடுத்து Save செய்தால் உங்களுகென்று ஒரு ID Create ஆகி விடும். அடுத்து வரும்
பக்கத்தில்
உங்களது Personal detail, Contact detail, Qualification detail, Technical detail ஆகியவற்றை பூர்த்தி செய்து Save செய்தால் உங்களது Register Number
Create ஆகிவிடும்.

குறிப்பு 1 : Qualification detail பூர்த்தி செய்தவுடன் add என்று பட்டன் இருக்கும் அதை கிளிக் செய்தால் ஒரு சின்ன விண்டோ ஓபன் ஆகும் அதில் கிளிக் செய்து Save
கொடுக்கவும். இதே போன்று Technical Detailம் செய்ய வேண்டும்.

குறிப்பு 2 : மேலே சொன்ன அனைத்தும் முடிவடைந்தவுடன் Home பகுதிக்கு சென்று பார்த்தால் Print ID Card என்று இருக்கும் அதை கிளிக் செய்து பிரிண்ட் எடுத்து கொள்ளலாம்.

குறிப்பு 3 : ஏதேனும் தவறாக செய்திருந்தால் Home பகுதியில் Modify Contact இருக்கும் அதில் சென்று மாற்றி கொள்ளலாம்.

குறிப்பு 4 : Update Profileல் சென்று Renewal செய்து கொள்ளலாம்.

Renewal செய்வதற்கான குறிப்பு :
உதாரணத்திற்கு Register Number இப்படித்தான் இருக்கும்.
Register Number : RPD2013M00007502
வேலைவாய்ப்பு அலுலகத்தின் குறியீட்டு எண்: ARD – என்பது ( வேலைவாய்ப்பு அலுவலகம், RAMANATHAPURAM )
பதிவு செய்த ஆண்டு : 2013
ஆண் / பெண் : M
பதிவு எண் : 7502
பதிவு எண் என்பது 8 இலக்க எண்ணாக இருத்தல் வேண்டும், அப்படி இல்லாமல் 4 இலக்க எண்ணாக இருந்தால் முன்னதாக 4 பூஜ்ஜியங்களை சேர்த்துக்கொள்ளவும்.
User ID : RPD2013M00007502
Password : dd / mm / yyyy
கடவு சொல்லில் உங்களது பிறந்த தேதியை கொடுக்கவும்.
உங்களது ID CARD இப்படிதான் இருக்கும்..
அவ்வளவு தான் நண்பர்களே.. இனி கால விரையமுமின்றி வீட்டில் இருந்தபடியே ஆன்லைனில் பதிவு செய்து கொள்ளலாம். பதிவில் ஏதேனும் தவறுகள் இருப்பின்
சுட்டிக்காட்டுங்கள் திருத்தம் செய்து கொள்கிறேன்.

 Tanx     tamilnewsbbc

Share this:

புதன், 27 ஆகஸ்ட், 2014

கம்ப்யூட்டர் ஹேங் ஆகி நின்னுடுச்சா… கவலையேப் படாதீங்க… இதோ தீர்வு… !!!!

வணக்கம் நண்பர்களே..!

உங்கள் கணினி அடிக்கடி அப்படியே ஸ்ட்ரக்ட் ஆகி உறைந்து நின்றுபோகிறதா? பின்னணியில் ஏதேனும் பிழைச் செய்தியை காண்பித்து அப்படியே உறைந்து அப்படியே உங்களையே வெறித்துப் பார்க்கிறதா? 

இதுபோன்ற பிரச்னைகள் சாதாரணமாக அனைத்து கணினிகளிலுமே ஏற்படக்கூடியதுதான். அதற்காக என்னவோ ஏதோவென்று பயந்துவிட வேண்டாம். அதாவது நீங்கள் உபயோகித்துக்கொண்டிருக்கும் applications களில் ஏதேனும் ஒன்று வேலை செய்யாமல் நின்றுவிட்டது என்றுதான் அதற்கு பொருள். அதிக பணிச்சுமை காரணமாகவோ, அதிகமான அப்ளிகேஷன்களை கணினியில் திறந்து வைத்திருந்தாலோ இதுபோன்ற நிகழ்வுகள் உங்கள் கணினியில் ஏற்படும்.

கணினி உறைதலை எப்படி உணர்ந்துகொள்வது? 

கணினியில் பணிசெய்துகொண்டிருக்கும்போது அந்த அப்ளிகேஷனை minimize செய்யவோ, maximize செய்யவோ முடியாது. எத்தனை தடவை நாம் முயற்சித்தாலும், மினிமைஸ் செய்யவோ, மேக்சிமைஸ் செய்யவோ முடியாது. அந்த விண்டோ அப்படியே திரையில் காட்சிக்குத் தெரியுமே தவிர நாம் மௌஸ் துணையுடன் அவற்றை சிறியது செய்யவே, பெரியதாக மாற்றவோ முடியாது. இவ்வாறு ஒரு application செயல்படாமல் அப்படியே நின்றுபோவது கணினி உறைந்துவிட்டது என்பதை அறிந்துகொள்வதற்கான ஒருவகை அறிகுறி. 

அதைப்போலவே மற்றுமொரு வகையான அறிகுறி என்னவெனில், அப்ளிகேஷன் விண்டோக்களை மினிமைஸ் செய்தால் எப்படி சிறியதாக காட்சித்திரை கீழிறங்குமோ… அதைப்போன்று தொடர்ச்சியாக விண்டோக்கள் மினிமைஸ் செய்வதைப்போன்ற தோற்றம் வந்துக்கொண்டே இருக்கும். இதுவும் கணினி உறைந்துவிட்டதைக் குறிப்பதற்கான ஒருவகையான அறிகுறியாகும். 

மற்றுமொரு முக்கியமான அறிகுறி.. Mouse pointer எங்கும் நகராமல் அப்படியே ஸ்தம்பித்து ஒரே இடத்திலேயே நிற்பது..அவ்வாறு மௌஸ் பாய்ண்டர் நகராமல் இருந்தாலும் கணினி ஸ்டரக் ஆகி நின்றுவிட்டது என்று அறிந்துகொள்ளலாம். 


மற்றுமொரு அறிகுறி not respond என்னும் பிழைச்செய்தியைக் காட்டும். சில நேரங்களில் this program performed an illegal operation will be shutdown என்ற எச்சரிக்கை செய்தியும் காட்டப்படும். 


இவ்வாறு ஏதேனும் ஒரு வகையில் நமக்கு கணினியானது உறைந்துவிட்டது என்பதை கணினி அறிவிக்கும். அப்பொழுது இந்த புரோகிராமை நிறுத்திவிடுமாறு பணிக்கும். அல்லது Cancel செய்துவிடுங்கள் என்ற செய்தியைக் காட்டும். அவ்வாறு கேன்சல் செய்த பிறகு தானாகவே மீண்டும் அந்த அப்ளிகேஷன் திரும்ப இயங்கும் வகையில் செயலாற்றும். 


ப்ளூ ஸ்கீரீன் டெத் (blue screen death) என்பது நமக்கு வெளிப்படையாகத் தெரியும் ஒரு அறிகுறியாகும். அச்சூழ்நிலையில் வெண்மை நிறத்தில் பிழைச் செய்திகளைக் காட்டும். இவ்வாறு தோன்றும் நிலையை கிராஸ்(crash) ஆகிவிட்டது என்பர்.


கணினி Crash ஆவதற்கு காரணம் என்ன? 


முக்கியமாக கணினி நினைவகத்தில் ஏற்படும் அதிக பணிச்சுமையை குறிப்பிடலாம். 


அடுத்து வன்பொருட்கள் ஒன்றுடன் ஒத்திசைந்து இயங்காத நிலையில் இவ்வாறான நிலை ஏற்படும். 


இயங்குதளம் (operating system), அப்ளிகேஷன்ஸ் சாப்ட்வேர்ஸ் (application softwares), Driver softwares ஆகிய மென்பொருள்களில் ஏற்படும் பிரச்னைகள் காரணமாகவும் இவ்வாறான கணினி உறைதல் நடைபெறும். 


கணினி நன்றாக செயல்பட வேண்டுமாயின், நிச்சயமாக கணினியில் இடம்பெற்றுள்ள மென்பொருள்களுக்குத் தகுந்த நினைவகம் (RAM-Random access Memory) வேண்டும். இந்த நினைவகம் ஏற்றுச் செய்யும் அளவைவிட அதிக மென்பொருள்களைப் பயன்படுத்தும்போது தற்காலிகமாக இவ்வாறான கணினி உறைநிலை ஏற்படும். இது தவிர்க்க இயலாத ஒன்று. 


அதாவது ஒன்றுக்கு மேற்பட்ட அப்ளிகேஷன்களை ஒரே நேரத்தில் இயக்க முற்படும்பொழுது அதிகமான பணிச்சுமையின் காரணமாக கணினி உறைந்துவிடும். 


கணினி உறைதலுக்கு வேறு சில காரணங்கள்: 


கணினியில் நாம் பயன்படுத்தும் வெவ்வேறுவிதமான அப்ளிகேஷன்களுக்கு இடையே உள்ள முரண்பாடுகள் காரணமாகவும்.  (இயங்கிகொண்டிருக்கும் அப்ளிகேஷன்கள் conflict ஆவதாலும்) கணினி உறைதல் ஏற்படுகிறது. 


Antivirus மென்பொருள்கள் மற்ற அப்ளிகேசன்களுடன் சில சமயம் ஒத்துப்போகாமல் இவ்வாறான conflict ஏற்படும்.


கணினி உறைதல் ஏற்பட்டால் என்ன செய்ய வேண்டும்? 


கணினியை Reboot செய்யலாம்.. அவ்வாறு ரீபூட் செய்யும்பொழுது பிரச்னை எதுவும் இல்லையென்றில் கண்டிப்பாக ரெஜிஸ்ட்ரியில் ஏதேனும் பிரச்னை இருக்கும். 


அவ்வாறு ரெஜிஸ்ட்டிரில் பிரச்னை என்றால், உங்கள் கணினியை Safe மோடில் இயக்கவிட்டு, நல்லதொரு Registry cleaner மென்பொருள் கொண்டு Registry கிளீன் செய்து, கணினியை பழைநிலைக்கு கொண்டு வரலாம். 


கணினியை Safmode-ல் இயங்க வைப்பது எப்படி? 


இது ஒன்றும் பிரமாதமான விஷயம் இல்லை.. உங்கள் கணினியை Restart கொடுக்கும்பொழுது F8 கீயை அழுத்தி, கணினி எந்த முறையில் தொடங்க வேண்டும் என்னும் மெனுவைப் பெறலாம். அதில் Safe Mode தேர்ந்தெடுத்து enter செய்வதன் மூலம் Safe mode-ல் கணினியை துவக்கலாம். 


ரெஜிஸ்ட்ரி பைல்கள் இடம் மாறினால் கூட கணினி இவ்வாறான உறைநிலைக்கு போக வாய்ப்பிருக்கிறது. 


Registry பைல்கள் என்றால் என்ன? 


Registry பைல்கள் என்பது கணினியில் இருக்கும் Registry எனும் அமைப்பில் இருக்கும் கோப்புகளாகும். இந்த Registry உள்ள கோப்புகள் ஒவ்வொன்றும் கணினியில் உள்ள ஒவ்வொரு அப்ளிகேஷனுக்குரிய கட்டளைகளை கொண்டிருக்கும். அந்த கட்டளைகளின் மூலமே கணினியில் அடுத்தடுத்த செயல்கள் நடைபெறும். அவ்வாறான அடுத்த அடுத்த செயல்பாடுகளை செய்யும் கட்டளை நிரல்வரிகளை உள்ளடக்கியிருப்பது இந்த ரெஜிஸ்ட்ரி பைல்களே..!


இத்தனை முக்கியத்துவம் வாய்ந்த Registry Fileகள் இடம்மாறும்பொழுது கணினியில் முறையான செயல்பாடு நடைபெறாது. அவ்வாறு செயல்பட எந்தெந்த கட்டளைகள் எங்கெங்கு உள்ளன என்பதை தேடிப்பெற கணினிக்கு அதிக சிரமம் ஏற்படும். இவ்வாறு தான் தேடும் கட்டளைக்குரிய கோப்புகள் கிடைக்காதபொழுது கணினி தானாகவே உறைந்துவிடும். 


தீர்வு: 


அப்ளிகேஷன்கள் இயங்காது அப்படியே உறைந்துவிடும்பொழுது Task Manager-ஐப் பயன்படுத்தி அந்த அப்ளிகேஷன்களின் செயல்பாட்டை முடிவுக்கு கொண்டு வரலாம். அதாவது Ctrl+Alt+ Delete பட்டன்களை ஒருசேர அழுத்தி தோன்றும் விண்டோவில் எந்த அப்ளிகேஷன் செயல்படாமல் உள்ளதோ அந்த அப்ளிகேஷனைத் தேர்ந்தெடுத்து End Task கொடுப்பதன் மூலம் அந்த அப்ளிகேஷனின் செயல்பாட்டை முடிவுக்கு கொண்டு வரமுடியும். 


அவ்வாறு செய்தும் அந்த அப்ளிகேஷனின் செயல்பாட்டை முடிவுக்கு கொண்டுவர முடியாமல் போகும்பொழுது மீண்டும் ஒருமுறை   Ctrl+Alt+ Delete அழுத்த கணினி ரீபூட்(Reboot)ஆகிவிடும். 


அப்படி செய்தும் ரீபூட் ஆகவில்லை எனில் இறுதியாக இந்த வழியை நீங்கள் கடைப்பிடிக்கலாம். அதாவது Reset பட்டன் ஒன்று சிறியதாக இருக்கும் அல்லவா? அந்த பட்டனை அழுத்தி மீண்டும் புதியதாக கணினியை மறுதொடக்கம் செய்யலாம். அவ்வாறு செய்தும் மறுதொடக்கம் ஆகவில்லை என்றால் கணினியில் மெயின் பவர் பட்டனை ஐந்து வினாடிகள் தொடர்ச்சியாக அழுத்திக்கொண்டே இருந்தால் கணினி தானாக தன்னை முடக்கிக்கொள்ளும். 


பிறகு மீண்டும் கணினியை Start செய்து பயன்படுத்தலாம். 


மிக்க நன்றி நண்பர்களே..!


- தங்கம்பழனி. 


தங்கம் வாங்க போறீங்களா? எச்சரிக்கை குறிப்புகள்

‘மளமள’வென விலைவாசி உயர்ந்துகொண்டே போனாலும் தங்கத்தின் மவுசு மட்டுமே என்றுமே குறையாது. தங்கத்தின் மீது ஆசைக்கொள்ளாத பெண்களே இல்லையென்றே சொல்லலாம்..
பெண்கள் மட்டுமா.. ஆண்களும் கூட அதன் மீது தனி மோகம்
வைத்திருக்கிறார்கள்..
என்றுமே.. எக்காலத்திலுமே தங்கத்தின் மதிப்பு குறைந்ததாக சரித்திரம் இல்லை.. அப்படிப்பட்ட தங்கம் இரண்டு வகையாக நமக்கு கிடைக்கும். ஒன்று  கட்டித்தங்கம்.. மற்றொன்று ஆபரணத்தங்கம்.
கட்டித் தங்கத்தை வாங்கி நேரடியாக நகை செய்ய முடியுமா என்றால் அது முடியாது. அதனுடன் ஒரு சில உலோகங்களை சேர்த்துதான் தங்க நகைகள் செய்ய முடியும்.
அவ்வாறு கலப்படம் செய்யப்பட்டு உருவாகும் நகைகளின் தரத்தை குறிக்கும் சொல்தான் காரட் (KARAT)என்பது.
தங்கத்தில் மற்ற உலோகங்கள் கலந்துள்ள விகிதத்தைப் பொறுத்து அவற்றை தரத்தை அறிய முடியும்.
அதாவது
  • 24 கேரட்,
  • 22 கேரட்
  • 18 கேரட்
  • 14 கேரட்
  • 10 கேரட்
  • 9 கேரட்
  • 8 கேரட்
 என தரம் பிரிக்கின்றனர்.
24 கேரட் தங்கத்தில் 99.9 சதவிகிதம் சுத்த தங்கமும், 22 கேரட் தங்கத்தில் 91.6 சதவிகிதம் தூய தங்கமும், 18 காரட் தங்கத்தில் 75 சதவிகிதம் தூய தங்கமும், 14 காரட் தங்கத்தில் 58.5 சதவிகிதமும், 10 கேரட்டில் 41.7 சதவிகிதமும், 9 கேரட்டில் 37.5 சதவிகதமும், 8 கேரட் தங்கத்தில் 33.3 சதவிகிதமும் தூய தங்கம் உள்ளது. 
 
இதில் 22 கேரட் தங்கமே பெரும்பாலும் பயன்பாட்டில் உள்ளது. அதாவது ஆபரணத்தங்கத்தில் 22 காரட் சுத்த தங்கத்தையே பெரும்பாலான ஜீவல்லரி நிறுவனங்கள் முக்கியத்துவம் கொடுத்து விற்கின்றனர். 22 காரட் தங்கத்தில் 97.61% சுத்த தங்கம் இருக்கும். வாடிக்கையாளரின் விருப்பமும் அதுவே.
இந்த வகையான தங்கத்தைதான் நாம் டிவியிலும், நாளிதழ், வார இதழ் விளம்பரங்களிலும் பார்க்கிறோம். இதை 916 BIS ஹால்மார்க் தங்கம் எனக் குறிப்பிடுகின்றனர்.  இதையே ஆபரணத்தங்கம் என்று குறிப்பிடுவார்கள்.
 
தங்கத்தின் தரத்தை அறிய ஹால்மார்க்:
பெரும்பாலான தங்க நகைகள் 24 கேரட், 22 கேரட், 18 காரட் தங்கமாகவே உள்ளது. எந்த வகையான தங்கம் என அறிய உதவுகிறது ஹால்மார்க் முத்திரை.
இந்த முத்திரையானது மற்ற எலக்ட்ரானிக் பொருட்களுக்கு தரத்தை நிர்ணயிக்கும் ISI தர முத்திரையைப் போன்றதுதான் தங்கத்தின் தரத்தை அறியும் BIS ஹால்மார்க் முத்திரை.
இந்திய அரசின் தரக் கட்டுப்பாடு அமைப்பு Bureau of Indian Standards என்பதின் சுருக்கமே BIS என அழைக்கபடுகிறது. இந்த இமைப்பு தங்க நகைகளுக்கு ஹால்மார்த் முத்திரையை வழங்கி தரத்தை நிர்ணயிக்கிறது.
 
BIS முத்திரையை யார் கொடுப்பார்கள்? 
BIS முத்திரையை வழங்குவதற்காக அரசு நாடு முழுவதும் உரிமைப்பெற்ற (License) டீலர்களை நியமித்திருக்கிறது. இந்த உரிமைப் பெற்ற டீலர்கள் மட்டுமே தங்க நகைகளுக்கு ஹால்மார்க் முத்திரையை வழங்க முடியும்.
ஜூவல்லரி கடை உரிமையாளர் இந்த நகைகளை பொற்கொள்ளர்களிடமிருந்து பெற்று இந்த லைசென்ஸ் பெற்ற டீலர்களிடம் பரிசோதித்து, அந்த நகைகளுக்கான தரத்தை நிர்ணயித்து ஹார்மார்க் முத்திரையைப் பெற்றுக்கொள்கின்றனர். சோதிக்கப்படும் நகைகள் 22 கேரட் கொண்டதாக இருப்பின் அவற்றை 91.6% ஹால்மார்க் முத்திரையும், 18 காரட் அளவுடையதாக இருப்பின் 75% ஹார்மார்க் முத்திரையும் கொடுக்கப்படுகிறது.
 
தங்கம் வாங்கறீங்களா? கொஞ்சம் கவனமா பார்த்து வாங்குங்க.. 
நீங்கள் வாங்கும் தங்கத்தில் ஹால்மார்க் முத்திரை மட்டும் இருந்தால் போதாது. அந்த ஹால்மார்க் முத்திரையில் நகையின் தரம் எத்தனை சதவிகிதம் என்பது குறிக்கப்பட்டிருக்கிறதா என்பதையும் கவனித்துப் பார்க்க வேண்டும்.
 
தவறான ஹால்மார்க் நகைகளை எப்படி கண்டுபிடிப்பது? 
நீங்கள் 22 காரட் நகையென கடைகளில் வாங்கிய பிறகு, ஏதாவது ஒருகாரணத்திற்காகவோ.. அல்லது சோதனை செய்து பார்க்கும்பொழுதே அந்த நகை 18 காரட் தரமுடைய நகை என்பதை தெரியவந்து உறுதி செய்யப்பட்டால் கண்டிப்பாக  தவறான ஹால்மார்க் முத்திரையை வழங்கிய டீலரின் லைசென்சை BIS அலுவலகம் ரத்து செய்துவிடும்.
தரமற்ற நகைகளை விற்ற ஜூவல்லரி கடையும் வாங்கிய நகைகளுக்கான நஷ்ட ஈடு வழங்கியே ஆக வேண்டும். அவ்வாறு நஷ்ட ஈடு தர மறுக்கும் பட்சத்தில் நீங்கள் நுகர்வோர் நீதிமன்றத்தை அணுகி நஷ்ட ஈட்டைப் பெற முடியும்.
 
இவர்தான் ஹால்மார்க் முத்திரையை வழங்கினார் என்பதை எப்படி கண்டுபிடிப்பது? 
இது மிக சுலபம். நீங்கள் வாங்கும் எந்த ஒரு ஆபரணத் தங்கத்திலும் கண்டிப்பாக ஹால்மார்க் முத்திரை இருக்கும்.  BIS ஒவ்வொரு டீலருக்கும் தனிப்பட்ட முத்திரையை வழங்கியிருப்பார்கள். அதாவது ஒருவருக்கு கொடுக்கப்படும் முத்திரை அடையாளமானது, மற்ற எந்த டீலருக்கும் அதே முத்திரையை கொடுக்கமாட்டார்கள். ஒவ்வொரு டீலருக்கும் தனிப்பட்ட முத்திரை தான் வழங்கப்படும். அதனால் குறிப்பிட்ட ஹால்மார்க் முத்திரைக்கு சொந்தக்காரர் இவர்தான் என எளிதாக அந்த அடையாளப்படுத்தி கண்டுபிடித்துவிடுவார்கள்.
 
தமிழ்நாட்டில் உள்ள BIS  அலுவலகங்களின் முகவரிகள்:
 
SOUTHERN REGIONAL OFFICE
C.I.T CAMPUS, IV CROSS ROAD,CHENNAI-600 013.
91 044 22542315,22541584, 22541470
Fax: 91 044 22541087 .
 sro@bis.org.in
COIMBATORE BRANCH OFFICE
5th Floor, Kovai Towers,
44 Bala Sundaram Road,
Coimbatore 641 018.
LandMark- on RTO road, near womens polytechnic
0422 2201016, 2210141, 2215622; Fax: 0422-2216705
cbto@bis.org.in
 
இந்தியாவில் உள்ள ஒவ்வொரு ஜூவல்லரி (நகைகடைகளிலும்) உள்ள நகைகளிலும் கண்டிப்பாக ஹால்மார்க் முத்திரை பதிந்தே விற்பனை செய்ய வேண்டும் என்பது கட்டாயமாக்கப்பட்டுள்ளது. இனி நீங்கள் நகைகள் வாங்கினால் அதன் தரம் என்ன எத்தனை காரட்.. அதில் BIS ஹால்மார்க் முத்திரை பதியப்பட்டுள்ளதா? என்பதையெல்லாம் நன்றாக கவனித்து வாங்குங்கள்…
உங்களின் பணத்தின் மதிப்புக்கேற்ற நகைகளையும் நீங்கள் வாங்க வேண்டாமா என்ன? கொஞ்சம் கவனம் செலுத்தினால் போதும். இந்த தகவல்களனைத்தையும் நகைக்கடைகளிலேயே பெற்று மனதுக்கு திருப்தியாக நகைகளை வாங்கலாம்.
நன்றி நண்பர்களே..!
 
இந்த பதிவு உங்களுக்குப் பயனுள்ளதாக இருக்கிறதா? உங்கள் கருத்துகளை பதிவு செய்யுங்கள். நண்பர்களுக்கும் தளத்தை அறிமுகம் செய்து வையுங்கள்.மற்றுமொரு புதிய பயனுள்ள பதிவின் வழி சந்திப்போம்.

இன்டர்நெட் பில் (internet bill)அதிகரிக்காமல் அளவோடு பயன்படுத்த

வணக்கம் நண்பர்களே..!
இணைய இணைப்பு பெற நாம் பல வழிகளை பயன்படுத்துகிறோம். அதாவது பிராட்பேண்ட்  டேட்டா கார்ட், செல்போன் போன்றவைகளிலிருந்து குறிப்பிட்ட   அளவு (1GB, 2GB, 500MB) போன்ற குறைந்த இணைய
பயன்பாடுள்ள வசதிகளைப் பயன்படுத்திக்கொண்டிருப்போம்.

இணையத்தைப் பயன்படுத்தும்பொழுது எவ்வளவு யூசேஜ் ஆகிறது.. என்பதை இன்னும் எவ்வளவு இருக்கும்?.. அதிகமாக பயன்படுத்தினால் இன்டர்நெட்பில் எகிறிடுமே.. என்றெல்லாம் சிந்தனையில் இருந்தவாறே பயன்படுத்திக்கொண்டிருப்போம்.
நம்மை அறியாமல் இணையத்தை கட்டுப்பாடில்லாமல் பயன்படுத்தும்பொழுது, பயன்படுத்ததக்க அளவை அடைந்து ஒன்று பயன்பாடு நின்றுவிடும். அல்லது அதிகபட்சம் பயன்படுத்தியதற்காக இன்டர்நெட்பில் இரட்டிப்பாகிவிடும்.
இவ்வாறான தொல்லைகளைத் தவிர்க்கவும், இணையத்தை இதுவரைக்கும் எத்தனை GB வரைக்கும் பயன்படுத்தியிருக்கிறோம் என்பதை நாம் ஒவ்வொரு முறையும் இணையத்தொடர்பை ஏற்படுத்தும்பொழுது குறிப்பிட்டுக் காட்டுவதற்காகவே ஒரு மென்பொருள் உள்ளது.
மென்பொருளின் பெயர் Net Speed Monitor. இந்த மென்பொருள் நாம் கணினியை உயிர்ப்பித்து, இணைய இணைப்பை ஏற்படுத்தும்பொழுது, இதுவரைக்கும் நாம் பயன்படுத்திய இணையத்தில் அளவை தேதி, மாத வாரியாக நமக்கு காட்டும்.
மென்பொருளைத் தரவிறக்கம் செய்ய சுட்டி:
http://netspeedmonitor.en.softonic.com/download
இந்த மென்பொருளைத் தரவிறக்கம் செய்து அதை விரித்து (Extract) செய்து நிறுவிக்கொள்ளுங்கள். மென்பொருளை நிறுவியவுடன் கணினியின் TaskBar-ல் வலதுபக்கம் நீல நிறத்தில் ஒரு சிறிய அளவீட்டு படம் தோன்றும்.
அதில் U எனக் குறிப்பிட்டிருப்பது Upload அளவினையும், D என்பது Download அளவினையும் குறிக்கும். இந்த அளவீடானது நீங்கள் இணையத்தை தொடர்புகொள்வதிலிருந்து ஆரம்பிக்கும்.
டாஸ்க்பாரில் உள்ள நீல நிற படத்தில் ரைட் கிளிக் செய்து நீங்கள் பயன்படுத்திய தரவுகளின் அளவுகள் முதல், சில மேலதிக வசதிகளையும் பெற முடியும்.
நன்றி நண்பர்களே..!


- தங்கம்பழனி
sdfasdfsdf sdf sdf sdfasdf

சனி, 23 ஆகஸ்ட், 2014

விரைவில் வருகிறது விண்டோஸ் - 9 !!


மைக்ரோசாப்ட் நிறுவனத்தில் புதிய ஆப்பரேட்டிங் சிஸ்டமான விண்டோஸ் - 9 வருகிற செப்டம்பர் 30 ஆம் தேதி வெளியிடப்படலாம் என்று செய்திகள் வருகிறது .
 
மைக்ரோசாப்ட் நிறுவனத்தின் நெருங்கிய வட்டாரத்தில் இருந்து வந்த செய்திகளின் படி அந்த நிறுவனம் பெரிய செய்தியாளர்கள் சந்திப்பு ஒன்றை செப்டம்பர் கடைசி வாரத்தில் நடத்த இருப்பதாகவும் , அந்த சந்திப்பில் விண்டோஸ் - 9 ஓ.எஸ் வெளியிடுவார்கள் என்று எதிர்பார்க்கப்படுகிறது .

விண்டோஸ் - 9 ஓ.எஸ் தொகுப்பில் மொபைலில் மட்டுமே இருந்து வந்த மொபைல் அசிஸ்டண்ட் ஆன கோர்டனா , இந்த புதிய ஓ.எஸ் இல் இடன் பெற இருக்கிறது . மைக்ரோசாப்ட் நிறுவனம் டெஸ்க்டாப் பயனாளர்களுக்கு அதிக முக்கியத்துவம் கொடுக்கும் என்று எதிர்பார்க்கப்படுகிறது .

கணிணி Crashஆவதற்கான காரணங்கள்


503c1959afa96f6e5400066f

கம்ப்யூட்டர் கிராஷ் -ஆகி நீல வண்ணத்தில் திரை மாறிவிடும், அல்லது அப்படியே திரைக்காட்சி முடங்கிப் போய்விடும்.கம்ப்யூட்டரில் பல பாகங்கள் ஒன்றிணைந்து இயங்குகின்றன. சில வேளைகளில் இவற்றுக்குள் பிரச்சனை வந்தால் இயங்குவது நின்று போகும். ஒவ்வெரு சாதனமும் ஒரு வழியை மேற்கொண்டு அதன் மூலம் தன் இயக்கத்தை மேற்கொள்ளும். இதில் ஒரே வழியை இரு சாதனங்கள் (பிரிண்டர், கீ போர்டு / மவுஸ்) எடுத்துக் கொள்ளும்போது இயக்கம் நின்றுபோகும்.

இவ்வாறு ஏற்படுகையில் start -> settings -> control panel -> system -> Device manager எனச் சென்று பார்த்தால், பிரச்சனை ஏற்பட்ட சாதனத்தின் பெயர் முன்னால் ஒரு மஞ்சள் நிற ஆச்சரியக்குறி தோன்றும். டிவைஸ் மேனேஜரில், கம்ப்யூட்டர் என்பதில் கிளிக் செய்து பார்த்தால், இந்த சேனல் வழிகளுக்கான ஐ-ஆர்-க்யூ என காட்டப்படும். ஒரே எண் இருமுறை இருப்பின் பிரச்சனை அங்குதான் உள்ளது என்று பொருள். இதற்குத் தீர்வு என்ன? பிரச்சனைக்குரிய சாதனத்தை அன்இன்ஸ்டால் செய்து மீண்டும் இன்ஸ்டால் செய்தால் போதும்.
ராம் மெமரியை உயர்த்துவதற்காகப் புதிய ராம் சிப் ஒன்றை இணைத்திருப்பொம். ஆனால், ஒன்றுக்கொன்று வேறுபாடான வேகம் உள்ளவையாக அவை இருக்கலாம். அவற்றிற்கிடையே இணைந்து செல்லும் நிலை ஏற்படாதபோது Fatel expection error ஏற்படலாம். இதனை கம்ப்யூட்டர் பாகங்களின் இயக்கம் தெரிந்தவர்கள் மூலம், பயாஸ் செட்டிங்ஸ் திறந்து, ராம் Waitstate நிலையைச் சற்று உயர்த்தலாம், அல்லது ஒரே மாதிரியான வேகத்தில் இயங்கும் சிப்களை அமைக்கலாம்.
ஹார்ட் டிஸ்க்கின் ஒழுங்கு நிலை கலையத் தொடங்கும். தேவையற்ற தற்காலிக பைல்கள் தேங்கும். பைல்கள் சிதறியபடி சேமிக்கப்படும். இதனால் இயக்க வேகத்திற்கு ஹார்ட் டிஸ்க் இணையாக இயங்க முடியாமல் போகும். அப்போது கிராஷ் ஆக வாய்ப்புண்டு. எனவே அடிக்கடி ஹார்ட் டிஸ்க்கினைச் சுத்தப்படுத்த வேண்டும். சி டிரைவில் தங்கும் தேவையற்ற பைல்களை அதற்கான புரோகிராம்களை கொண்டு நீக்கலாம்.

வீடியோ கார்ட்: சில வேளைகளில் கிராஷ் ஆகும்போது Fatel OE expection and VXD errors என்ற செய்தி கிடைக்கும். இது வீடியோ கார்டினால் ஏற்படுவது. இதனை தவிர்க்க வீடியோ டிஸ்பிளேமின் ரெசல்யூகளைக் குறைக்கவும், start>>settings>>control panel>>Display settings எனச் சென்று ஸ்கிரீன் ஏரியா பாரினை இடது மூலையில் நிறுத்தவும், அதே போல் கலர் செட்டிங்ஸ் சென்று 16 பிட் என்ற அளவில் அமைக்கவும்.

வைரஸ்: பெரும்பாலான கம்ப்யூட்டர் கிராஷ்களுக்கு வைரஸ்களே காரணம். சரியான ஆண்ட்டி வைரஸ் புரோகிராம் ஒன்றை நிறுவி, அப்போது அதனை அப்டேட் செய்வது மட்டுமே இதனை தடுக்கும். பல வைரஸ்கள் பூட் செக்டாரைக் கொடுத்து வைக்கும். இதனால் கம்ப்யூட்டரை இயக்கவே முடியாது. எனவே, இது போன்ற நிலையில் கை கொடுக்க விண்டோஸ் ஸ்டார்ட் அப் டிஸ்க் ஒன்றை உருவாக்கி கைவசம் வைத்துக்கொள்ளுங்கள்.

பிரிண்டர்: பல வேளைகளில் கம்ப்யூட்டர்கள் பிரிண்ட் எடுக்கையில் கிராஷ் ஆவதை நீங்கள் கவனித்திருக்கலாம். இதற்கு காரணம் பிரிண்டர்களில் மிகவும் குறைந்த அளவில் பபர் மெமரி இருப்பதே காரணம். மேலும், கம்ப்யூட்டரிக் சிபியு சக்தியை பிரிண்டர்கள் சற்று அதிகமாகவே பயன்படுத்தும்.
எனவே பல வேளைகளுடன் பிரிண்டிங் வேலையை மேற்கொள்கையில், அல்லது அதிகமான அளவில் பிரிண்டருக்கு டேட்டாவினை அனுப்புகையில் கிராஷ் ஏற்படும். நாம் சாதாரணமாக காணாத கேரக்டர்களை பிரிண்டர் அச்சிட்டால் இந்த பிரச்சனை தலை தூக்குகிறது என்று பொருள். உடனே பிரிண்டருக்கு செல்லும் மின்சாரத்தை 10 விநாடிகளுக்கு நிறுத்தி பின் மீண்டும் இயக்கவும்.

சாஃப்ட்வேர்: முழுமையாக இல்லாமல் அல்லது மோசமாக இன்ஸ்டால் செய்யப்பட்ட சாஃப்ட்வேர் தொகுப்புகளால், கம்ப்யூட்டர் கிராஷ் ஆகலாம். இவற்றை சரியாக அன்இன்ஸ்டால் செய்திட வேண்டும். இல்லையேல் இவை தொடர்பான வரிகள், ரெஜிஸ்ட்ரியில் இருந்து கொண்டு இந்த சாஃப்ட்வேரினை இயக்குகையில் கம்ப்யூட்டரை கிராஷ் ஆகும் நிலைக்கு கொண்டு வரலாம்.
ரெஜிஸ்ட்ரியைச் சுத்தம் செய்திடவென வடிவமைக்கப்பட்ட புரோகிராம்களைக் கொண்டு அதனைச் சரி செய்திட வேண்டும். இல்லையேனில் மீண்டும் விண்டோஸ் இயக்கத்தினை இன்ஸ்டால் செய்திட வேண்டியதிருக்கும்.

இப்போது வருகின்ற சிபியுக்கள் மீது சிறிய மின் விசிறிகள் பொருத்தப்பட்டு சிபியு இயக்கத்தின் போது உருவாகும் வெப்பம் வெளிக்கடத்தப்படுகிறது. சிபியு அதிக சூடானாலும், அதிக குளிர்ச்சியினால் பாதிக்கப்பட்டாலும், கெர்னல் ஏரர் (Kernal error) என்று ஒரு பிரச்சனை ஏற்படும். பொதுவாக எந்த வேகத்தில் ஒரு சிபியு இயங்க வேண்டுமோ அதனை காட்டிலும் அதிக வேகத்தில் இயங்கும் வகையில், சிபியு செட் செய்யப்பட்டருந்தாலும் அதிக வெப்ப பிரச்சனை ஏற்படும். எனவே சிபியு விண் வேகத்தினை பயாஸ் செட்டிங்ஸ் சென்று குறைக்க வேண்டும்.கம்ப்யூட்டருக்கு செல்லும் மின் ஒட்டத்தினை சீராகத் தரும் சாதனங்களை கொண்டு தராவிட்டால், கிராஷ் ஆகும் வாய்ப்புகள் அதிகம் உண்டு.

உங்கள் கையெழுத்தை font ஆக மாற்றுவது எப்படி???

signஉங்களது சொந்த கையெழுத்தை ஒரு எழுத்துரு (font) ஆக மாற்ற உதவும் ஒரு சிறிய, சிறந்த மென்பொருள் தான் scanahand-free.
செய்முறை : இவ் மென்பொருளில் இருந்து பெற்றுக்கொள்ளப்படும் வடிவமைப்பை print செய்துகொள்ளுங்கள். print செய்யப்பட்ட தாளில் குறிப்பிட்ட படி ஒவ்வொரு எழுத்திற்கு கீழேயும் உங்கள் கையால் எழுத்தை எழுதுங்கள். (கறுப்பு marker அல்லது கறுப்பு தடித்த பேனாவை* பயன்படுத்தவும்.) பின்னர் எழுதப்பட்டதை scan செய்து மென்பொருளுடன் இணைக்கவும். அவளவும் தான், உடனடியாக உங்களது தனித்துவ எழுத்துரு தயாராகிவிடும்
windows கணினிகள் மற்றும் mac கணினிகளுக்கு பயன்படுத்த கூடியதாக அந்த எழுத்துருக்கள் இருப்பதுடன். இணையத்தளங்களிலும் இணைய எழுத்துருவாக பயன்படுத்த இந்த மென்பொருள் உதவுகிறது.

ஞாயிறு, 17 ஆகஸ்ட், 2014

ஆன்ட்ராய்ட் அப்ளிகேஷன்களை கூகுள் பிளே ஸ்டோரிலிருந்து கணினியில் பதிவிறக்கம் செய்ய

கூகுள் பிளே ஸ்டோரில் உள்ள அப்ளிகேஷன்களை நேரடியாக கணினியில் பதிவிறக்கம் செய்வது எவ்வாறு என்று ஏற்கனவே எழுதியிருந்தேன் . அது ஒரு மென்பொருள் உதவியுடன் பதிவிறம் செய்வது ஆகும். ஆனால் இந்த முறைமையானது ஆன்லைன் உதவியுடன் ஆன்ட்ராய்ட் அப்ளிகேஷனை பதிவிறக்கம் செய்வது எவ்வாறு என பார்ப்போம். ஆன்ட்ராய்ட் பற்றியோ கூகுள் பிளே ஸ்டோர் பற்றியோ பெரிய முன்னுரை தேவையில்லை என்று நினைக்கிறேன்.
ஆன்ட்ராய்ட் என்பது கூகுள் நிறுவனத்தின் மொபைல்/டேப் களுக்கான இயங்குதளம் ஆகும். இந்த இயங்குதளத்தில் இயங்கும் அப்ளிகேஷன்களுக்கென ஒரு சந்தையினை உருவாக்கியது அதற்கு பெயர் தான் பிளேஸ்டோர் ஆகும். இச்சந்தையில் தற்போது கூகுள் நிறுவனத்தின் சோதனைக்குட்பட்ட மென்பொருள்கள் மட்டுமே உள்ளன.
கூகுள் பிளே ஸ்டோரில் இருக்கும் அப்ளிகேஷன்களை நாம் நேரிடையாக கணினியில் பதிவிறக்கம் செய்ய முடியாது. ஆன்ட்ராய்ட் இயங்குதளம் நிறுவப்பட்ட மொபைல் சாதனம் மற்றும் டேப்  லிருந்து மட்டுமே ஆன்ட்ராய்ட் அப்ளிகேஷன்களை பதிவிறக்கம் செய்ய முடியும்.
கூகுள்பிளேஸ்டோரில் இருக்கும் அப்ளிகேஷன்களை கணினியில் பதிவிறக்கம் செய்ய ஒரு தளம்  உதவி செய்கிறது.
தளத்திற்கான சுட்டி 

எந்த அப்ளிகேஷனை பதிவிறக்கம் செய்ய வேண்டுமோ அதற்கு குறிப்பிட்ட அப்ளிகேஷனின் URL முகவரி கண்டிப்பாக வேண்டும். URL முகவரியினை பெற பிளேஸ்டோர் சென்று குறிப்பிட்ட அப்ளிகேஷனின் முகவரியினை பெற்றுவிட முடியும்.


சுட்டியில் குறிப்பிட்ட தளத்திற்கு சென்று, குறிப்பிட்ட அப்ளிகேஷனின் முகவரியை (url) குறிப்பிட்டு பின் Generate Download Link என்னும் பொத்தானை அழுத்தவும். சில நொடிகளில் பதிவிறக்கம் செய்வதற்கான சுட்டி கிடைக்கும் அதை பயன்படுத்தி கணினியில் பதிவிறக்கம் செய்து கொள்ள முடியும்.


கணினியில் தரவிறக்கம் செய்யும் ஆன்ட்ராய்ட் மென்பொருள்களை வழக்கம்போல் ஆன்ட்ராய்ட் சாதனங்களில் பயன்படுத்திக்கொள்ள முடியும்.


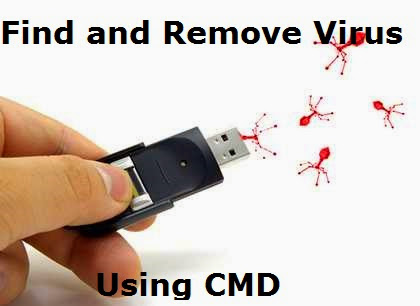
How to Find & Remove Viruses in Windows using Command Prompt


Hello friend messing up with some virus? Though your antivirus software removes virus and problem persists, searching google for the removal and you are into a perfect site for a solution. Virus is a computer program that can copy itself and infect your computer. These viruses can spread via USB/flash drive or from one computer to other computer by few written codes.

There are many antivirus software available to remove viruses from computer. But there are some viruses or suspicious files which can’t be removed by any antivirus software. Some suspicious files such as autorun.inf initiate all the viruses in pc.

Remove virus using CMD

These files must be removed for safe operation of your pc, because they may lead to data loss, software damages etc.Here's a trick to remove all your viruses. Follow the steps given below to remove viruses using cmd ( command prompt )

Finding & Removing Viruses Using Command Prompt


Follow the below guide only if you think any of your drive is affected with virus or if you think there are some harmful files and you want to delete them.

Step 1: Go to start menu and type “cmd” in the search box or Start>all programs>accessories>command prompt.

Step 2: Select the infected drive,to do so type in CMD , D: to go to D: drive.

Step 3: Now type dir/w/a . It will show all the files of the drive including hidden files.

Now Check if there is any file or virus that you are not aware of and you think might be Harmful to your PC.

Step 4: Usually there is Autorun.inf file which you must delete it. to do so Type in attrib -h -r -s autorun.inf  and press Enter. Type del autorun.inf  and press Enter. Follow this for all other drives.

Step 5: We have now Succesfully found and deleted autorun.inf file from D drive. if you find any .exe file which is unknown to you. then delete it using the same above method.

How to remove Shortcut virus using cmd ?

The Shortcut viruses are those which converts all your data from your pen drive or Hard disk to shortcuts, but they are recoverable. just follow the below given steps to remove shortcut virus from pen drive and recover back your files.

  • Go to Start -> Run -> cmd.
  • Go to your pen drive directory.
  • Type this command: del *.lnk and press Enter.
  • Type attrib -h -r -s /s /d e:\*.* And then press Enter.

Recover your files :

You can recover your files through Winrar.

  1.  Open WINRAR Application.
  2. Navigate to your Pendrive location or PC Folder location.
  3. Copy Files and Paste where you want.
  4. Format your Pendrive. 

Got some Files in your pen drive but they are empty! Because of the virus in your pendrive malfunctions your drive. How to remove this empty folder virus and recover files? Follow the steps given below.
  • Start -> Run -> cmd.
  • Type this command: attrib -h -r -s /s /d x:\*.* 
  • Here the letter "x" should be replaced with the drive alphabet of your pendrive that you have inserted into the computer.
  • If your pendrive shows the drive alphabet as "J", then type  this command: attrib -h -r -s /s /d j:\*.* And then press Enter.

Restart your Pc for the changes to take place... So these were some methods to find and remove different viruses using Command Prompt. I hope this will help many of my Readers.
If You Like This Post Please Mind to Share It.

சனி, 16 ஆகஸ்ட், 2014

4 Ways to Get Paid Android Apps for Free

We love apps. We love free apps. And we love paid apps that cost nothing most of all. But we don't like pirates, so if you have an eye patch on your face and a parrot on your shoulder, be gone with ye! Having said that, there's plenty of legal ways to get paid apps for free for your Android so today we're going to share a few with you.

There are millions of premium apps available on the Google Play Store and other app stores such as Amazon, you can’t get these apps free, instead you’ve to pay in order to get your favorite Android app for free. Today we’re going to discuss a few ways you can get the paid Android apps for free.

4 Ways to Get Paid Android Apps for Free


1.App Gratis:

It offers new app for free daily. No overloading of other apps- just one app a day. Sometimes the free apps offered by App-gratis won’t be eligible for updates. You better ignore this negativity because deals keep coming and often there is gem of an app. Nevertheless, the AppGratis deals just keep coming and there's often some real gems in there.


2. Amazon App of the day:

Amazon app store for Android is one of the best app store for mobile devices and there is no doubt that it is still giving tough competitor of Google Play store. It is doing everything to drag its consumers back from Google play store. For now they offer free app every day. 

Just go to Amazon app of the day to see which app they are offering currently. Download the Amazon app of the day or grab a notification app like free app Notifier for Amazon.

3. App of the Day

App of the Day does basically the same thing as AppGratis and Amazon, offering a paid app for free (or discounted) for a limited time only. There's lots of different versions of this app, so you need to get the one relevant to your location (otherwise the Play Store will tell you it is incompatible with your devices), but once you've got it installed you can add it to your daily check list for scoring paid apps for free. 

I should also note that other apps, like App Sales, let you add apps you're interested in to a watch list, so you can be notified when they go on sale. Not exactly free but still better than full price. Plus, App Sales occasionally post free apps too.


4.Google Play returns Policy:

If you are confuse whether you should pay for certain game or not this app is a must have app for you. It lets you try that game for 15 minutes. I know 15 minutes may not be enough to know the game but these minutes are more than enough to feel whether the game is worth your money or not.

These were all the possible ways to get paid android apps for free and the legal way. Hopefully you like it and give it a try if you really need some premium apps. Do let us know and share your own views in the comment section below. For Android Tips and App reviews keep visiting

If You Like This Post Please Mind to Share It.

Collection of Windows 8 Shortcut Keys to save your Time

Shortcut keys in Windows means We can Perform Specific Task by just pressing a key or Combination of keys which saves us time and helps us to explore more about our windows PC. We often use Basic shortcut keys, but the use is really limited to 4 or 5 shortcut keys to perform basic tasks.

Today in this article i will share Collection of Windows 8 Shortcut keys that will ease up your Task performing exerience and will save your lot of time.

Collection of Windows 8 Shortcut Keys

Windows 8 Shortcut Keys 
 
1. Windows + T - Go to first item in Taskbar, continue with arrow keys
2. Windows + U - Open Ease of Access Centre
3. Windows + X - Open Power User Commands on Desktop
4. Windows + S - Search Settings
5. Windows + P - Display Projection Options
6. Windows + O - Disable screen rotation / orientation
7. Windows + R - Open Run dialog box
8. Windows + Q - Open Windows Apps Search
9. Windows + W - Search in Windows Settings
10. Windows + M - Minimize all Windows
11. Windows + N - Create new One Note
12. Windows + L - Lock your computer
13. Windows + Shift + M - Restore minimized Windows
14. Windows + Ctrl + F - Search for Computers in a network
15. Windows + F - Search for the Files in Computer
16. Windows + H - Open Share Panel
17. Windows + B - Set focus to Notification Area
18. Windows + E - Show Windows Explorer with File’s Tree View
19. Windows + E - Show Windows Explorer with File’s Tree View
20. Windows + K - Open Device Connections
21. Windows + C - Open Charms bar
22. Windows + I - Open settings including Control Panel, PC Info, Desktop, Personalization, Help
23. Windows + J - Toggle foreground between the filled and snapped applications
24. Windows + D - Toggle “Show Desktop”
25. Windows + Enter - Open Windows Narrator
26. Windows + Spacebar - Change the Keyboard Layout / Input Language
27. Windows + Page Down - Move Start Screen to the right side of screen
28. Windows + Alt + Enter - Open Media Center (If Media Center is Installed on your PC
29. Windows + Page Up - Move Start Screen to the left side of screen
30. Windows + Down Arrow - Minimize / Restore the currently active Windows
31. Windows + Up Arrow - Maximize the currently active Windows
32. Windows + Right Arrow - Dock the current Windows to right half of the screen
33. Windows + Left Arrow - Dock the current Windows to left half of the screen
34. Windows + Minus - Magnifier Zoom-Out
35. Windows + Plus - Magnifier Zoom-In
36. Windows + Esc - Close Magnifier
37. Windows + Shift + Right Arrow - Move the currently active Windows to the right side of monitor
38. Windows + Shift + Left Arrow - Move the currently active Windows to the left side of monitor
39. Windows + Shift + Down Arrow - Minimize / Restore the currently active Windows vertically, while maintaining its width
40. Windows + Shift + Up Arrow - Maximize the currently active Windows vertically, while maintaining its width
41. Windows + F1 - Open Windows Help and Support
42. Windows + Break - Display System Properties dialog box
43. Windows + Ctrl + Tab - Toggle through Applications and snap them as they cycle
44. Windows + Tab - Toggle through all Applications
45. Windows + Shift + Tab - Toggle through Applications in reverse order
46. Windows + Forward Slash (/) - Initiate IME (Input Method Editor) reconversion
47. Windows + Shift + Dot (.) - Move the gutter to the left
48. Windows + Dot (.) - Move the gutter to the right
49. Alt + T - Cut
50. Alt + V - Paste
51. Alt + P + E - Display Open With… dialog box
52. Alt + W - Create a new document or select a template
53. Windows + Comma - Temporarily view desktop
54. Alt + S + I - Invert the selection
55. Alt + R - Rename selected files
56. Alt + P + S - Insert label
57. Alt + D - Delete selected files or folder
58. Alt + P + R - Open properties
59. Alt + M - Move the files
60. Alt + S + A - Select all
61. Alt + C + P - Copy path to the file or folder
62. Alt + A - Open the special features.
63. Alt + E - Edit selected files
64. Alt + C + O - Copy selected items
65. Alt + H - Shows history of file versions
66. Alt + S + N - Deselect
67. Alt + N - Create a new folder
68. Alt + Shift - Change Keyboard Language layout if multiple language layouts are active
69. Ctrl + Mouse Scroll Wheel - Change Size of Icon
70. F11 - Toggle Full Screen Mode

I hope you will like this huge Collection of Windows Shortcut keys, if you would like to add some more shortcut keys that may be useful then feel free to share it in Comments Box below
If You Like This Post Please Mind to Share It.

How to Use Pendrive as RAM in Windows


In this Technology World, almost Every Student and Computer user own a Pendrive. Some may own Couple of them. Pendrive is Used to Store Important Data or to transfer files from one computer to another. but do you know that you can Use Pendrive as RAM and Boost your PC performance?

You might be now Anxious to know How to use Pendrive as RAM Right? You must be Because RAM plays an important part for your PC performance. With the Introduction of Readyboost Feature in Windows, it has become easier to Boost your PC and speed it up.

How to Use Pendrive as RAM with Readyboost

To use your Pendrive as RAM, You have to make Sure that you have a Pendrive which have a Free Storage Capacity of 4GB.

A pendrive with 8gb capacity is Highly Recommended to perform this Task

Step 1: Insert your 4GB or 8GB Pendrive.

Step 2: Take a Backup of any data already present in your pendrive, Because its adivisible to format your pendrive before moving forward.

Step 3: Now goto My Computers and Right Click on your Pendrive to Select Properties.

Step 4: Click on Readyboost Tab, Now wait couple of seconds so that it analyzes your Pendrive, Next you will see something like below Picture

Use Pendrive as RAM in Windows

Step 5: Click on Use this Device, Select the number of MBs you want to use out of total space, Then Click on Apply

Step 6: Next you will see Readyboost is Configuring your Cache, When its Done, Just reboot your PC to Feel the Difference

TIP: Once you Start using ReadyBoost Feature, you will have to Practice to Remove your Pendrive Safely Before Ejecting it to Avoid any trouble.

This was a Very simple and Effective Step by Step Guide on How to Use Pendrive as RAM in Windows PC. I hope this article will help you and so will you Share it on Social Media to Help us Grow. Don't Forget to Read more Interesting and Helpful articles on our Blog.

If You Like This Post Please Mind to Share It.

Trick to Use Android Smartphone as WebCam


If you do not own a WebCam, then you can now easily use your smartphone as Web Camera. If your Smartphone have good Camera quality then its even better. Web Camera Comes really handy when you wish to video chat with your friends or family members.
Use Android Smartphone as WebCam

By using your Android Smartphone as Web camera, you will even save Money and its very useful when you need a web cam urgently and your web cam don't Work Proberly.

We will Be using an APP to perform this trick. Other things you need is a USB cable to Connect your Smartphone to PC.

Steps to use Android Smartphones as Web Camera

Step 1: Download and Install DroidCam app on your Android Smartphone.

Step 2: Download DroidCam Windows Client and install it on your PC.
Install it as just you install other Softwares. it will automatically Install all the required Drivers.

Step 3: Once you have Downloaded and installed DroidCam on your Smartphone and PC, its time to connect your Smartphone to PC using USB Cable, Make sure to enable USB Debugging on your Smartphone.

Step 4: Once your smartphone is connected to your PC, Its Time to open DroidCam app on your Smartphone and the Windows Client on your PC. Click on USB icon and then Click "START"

Step 5: Thats it, now you will see the Magic On your Screen. Enjoy!!

These above steps should work well but if you find it difficult to Perform this trick then Visit this link to know more.

If you Still have any Trouble then Feel free to Comment in below Comment box.
If You Like This Post Please Mind to Share It.

Popular Posts

Facebook

Blog Archive